
WHAT IS THE PURPOSE OF THIS TUTORIAL?
The purpose of this tutorial is to show teachers how to install our District Adopted Screencastify Unlimited accounts onto their Google Chrome browser and use essential features to record and share educational instructional videos with students. This is an important tool for flipped instructional videos.
Step 1: Install Screencastify Unlimited Google Chrome Add-On
If you already have Screencastify installed under your IUSD Google account, you will automatically be upgraded to the Unlimited account. If you would like to install the extension, please follow the steps below. If you are finding that Screencastify is not working, you can remove it from Chrome and reinstall it by following these directions.
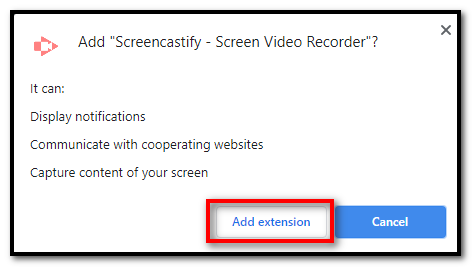
- Go to the Chrome Webstore and enter Screencastify in the search bar
- Click Add extension as shown below
Step 2: Allow Screencastify to connect with IUSD Google account
- Select the Sign in with Google button and log in with your IUSD Google account
- Accept the Set Permissions by allowing Screencastify to use the camera/microphone, and drawing/annotation tools by clicking the NEXT button
- Click the ALLOW button to accept the permissions
- The screenshot below will appear at the upper left hand corner of the page. Click the ALLOW button.
Step 3: Click on Screencastify icon in Google Chrome Browser
The icon will be located on the top right hand side of your browser bar.

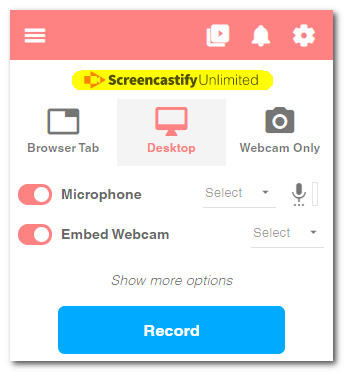
Once you click the icon, the menu screen will open (pictured below). You will now notice that the word Unlimited appears. This means that you have activated your District account with upgraded and paid for features.
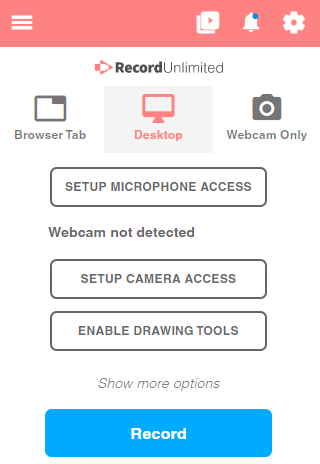
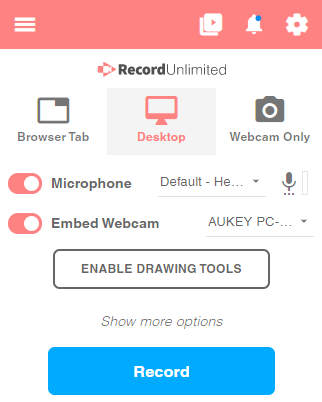
Step 4: Webcam and Microphone Options
Click on the webcam options you would like for your video. There are 3 options to record video
- Browser Tab (Just the tab you are working in)
- Desktop (Your entire desktop screen)
- Webcam only (Just your webcam recording your face and background)
Enable the microphone if you would like to record sound. You can also enable your webcam if you would like to.
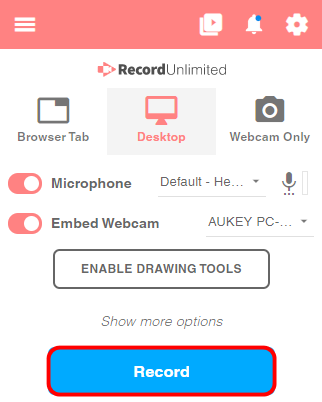
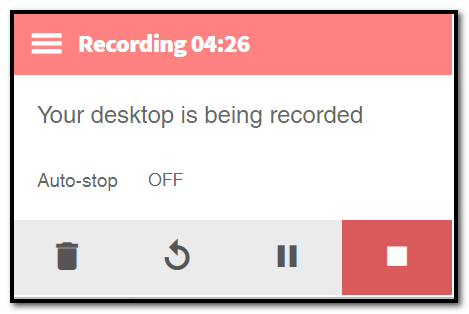
Step 5: Recording
Once you set your recording options and hit the RECORD button, you will have the option to select which screen you’d like to record if you selected Desktop. Then there will be a countdown to the recording.

Step 6: Locate Video Annotation Toolbar
These will be located in the bottom left of your screen. You will have the following controls available

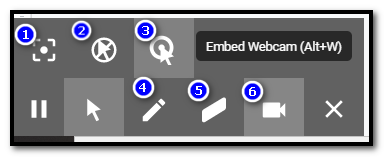
- Focus Mouse
- Hide Cursor
- Show circle on Mouse Click
- Pen
- Eraser
- Enable Webcam
- Wipe Screen
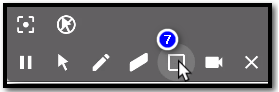
Step 7: Press End Button
Click the Screencastify extension in Google Chrome Browser to pause, end, or delete the recording.
Step 8: Saving to Google Drive
Once you press the red button to the end recording it will automatically save to your Google Drive and open the Screencastify editing window
Step 9: Edit your Video
You can access the Screencastify Editor tool by clicking on the Screencastify icon at the top right of your browser.

Then, click the menu icon, followed by Editor in the options.
You can select your media and edit using the different tools. These include Cut, Blur, Zoom, etc. You can locate the editing tools at the bottom of the toolbar.

When you have finished editing your video, you can save it to your Google Drive or to your device.
Step 10: Sharing Options with Students


Step 11: Description of Sharing Options
- Copy Shareable Link - Copy and paste the link directly into Google Classroom or Canvas
- Google Classroom - Share directly to Google Classroom
- Get embed code - Embed video right into your Canvas account
- Generate QR Code - Share QR code (link) to video
- Download - Download video to computer and share from desktop
- Export as MP4 - Shared video as an MP4 and post in Canvas or Google Classroom
- Export Audio Only - Just export the sound and leave the video off.
- Export Animated GIF - Compressed video without sound. Great for step by step tutorials
Troubleshooting
If you encounter an issue where the Screencastify extension does not show “ScreencastifyUnlimited”, please remove the extension from your browser and start over.
- Right click on Screencastify and click Remove from Chrome…
- Find Screencastify on the Chrome webstore and click Install
- Click on the extension and use the Sign in with Google option
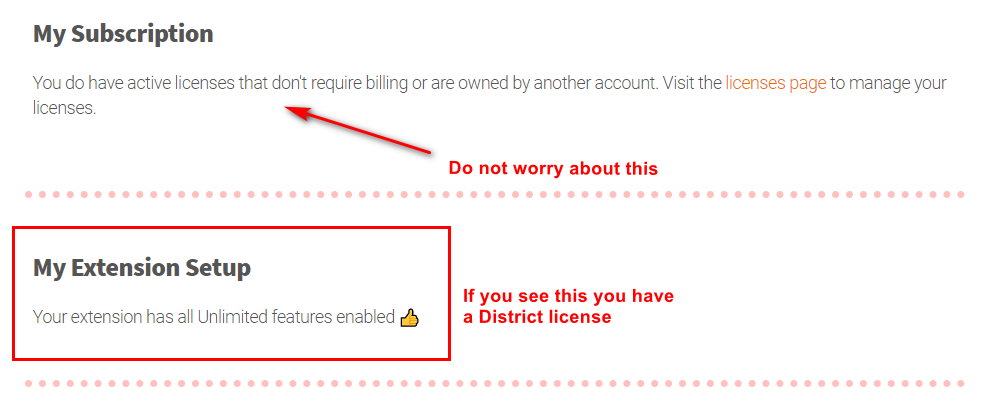
If you are looking at My Subscription, you will not see an active license attached to your account. As long as your My Extension Setup says “Your extension has all Unlimited features enabled”, you have a district license.
This document was created for Irvine Unified School District by the Information Technology Department.
If you have any questions, submit a new ticket or email us at helpdesk@iusd.org.
Last updated 10/31/23 CK
Comments
0 comments
Please sign in to leave a comment.